
catching up on kids' albums
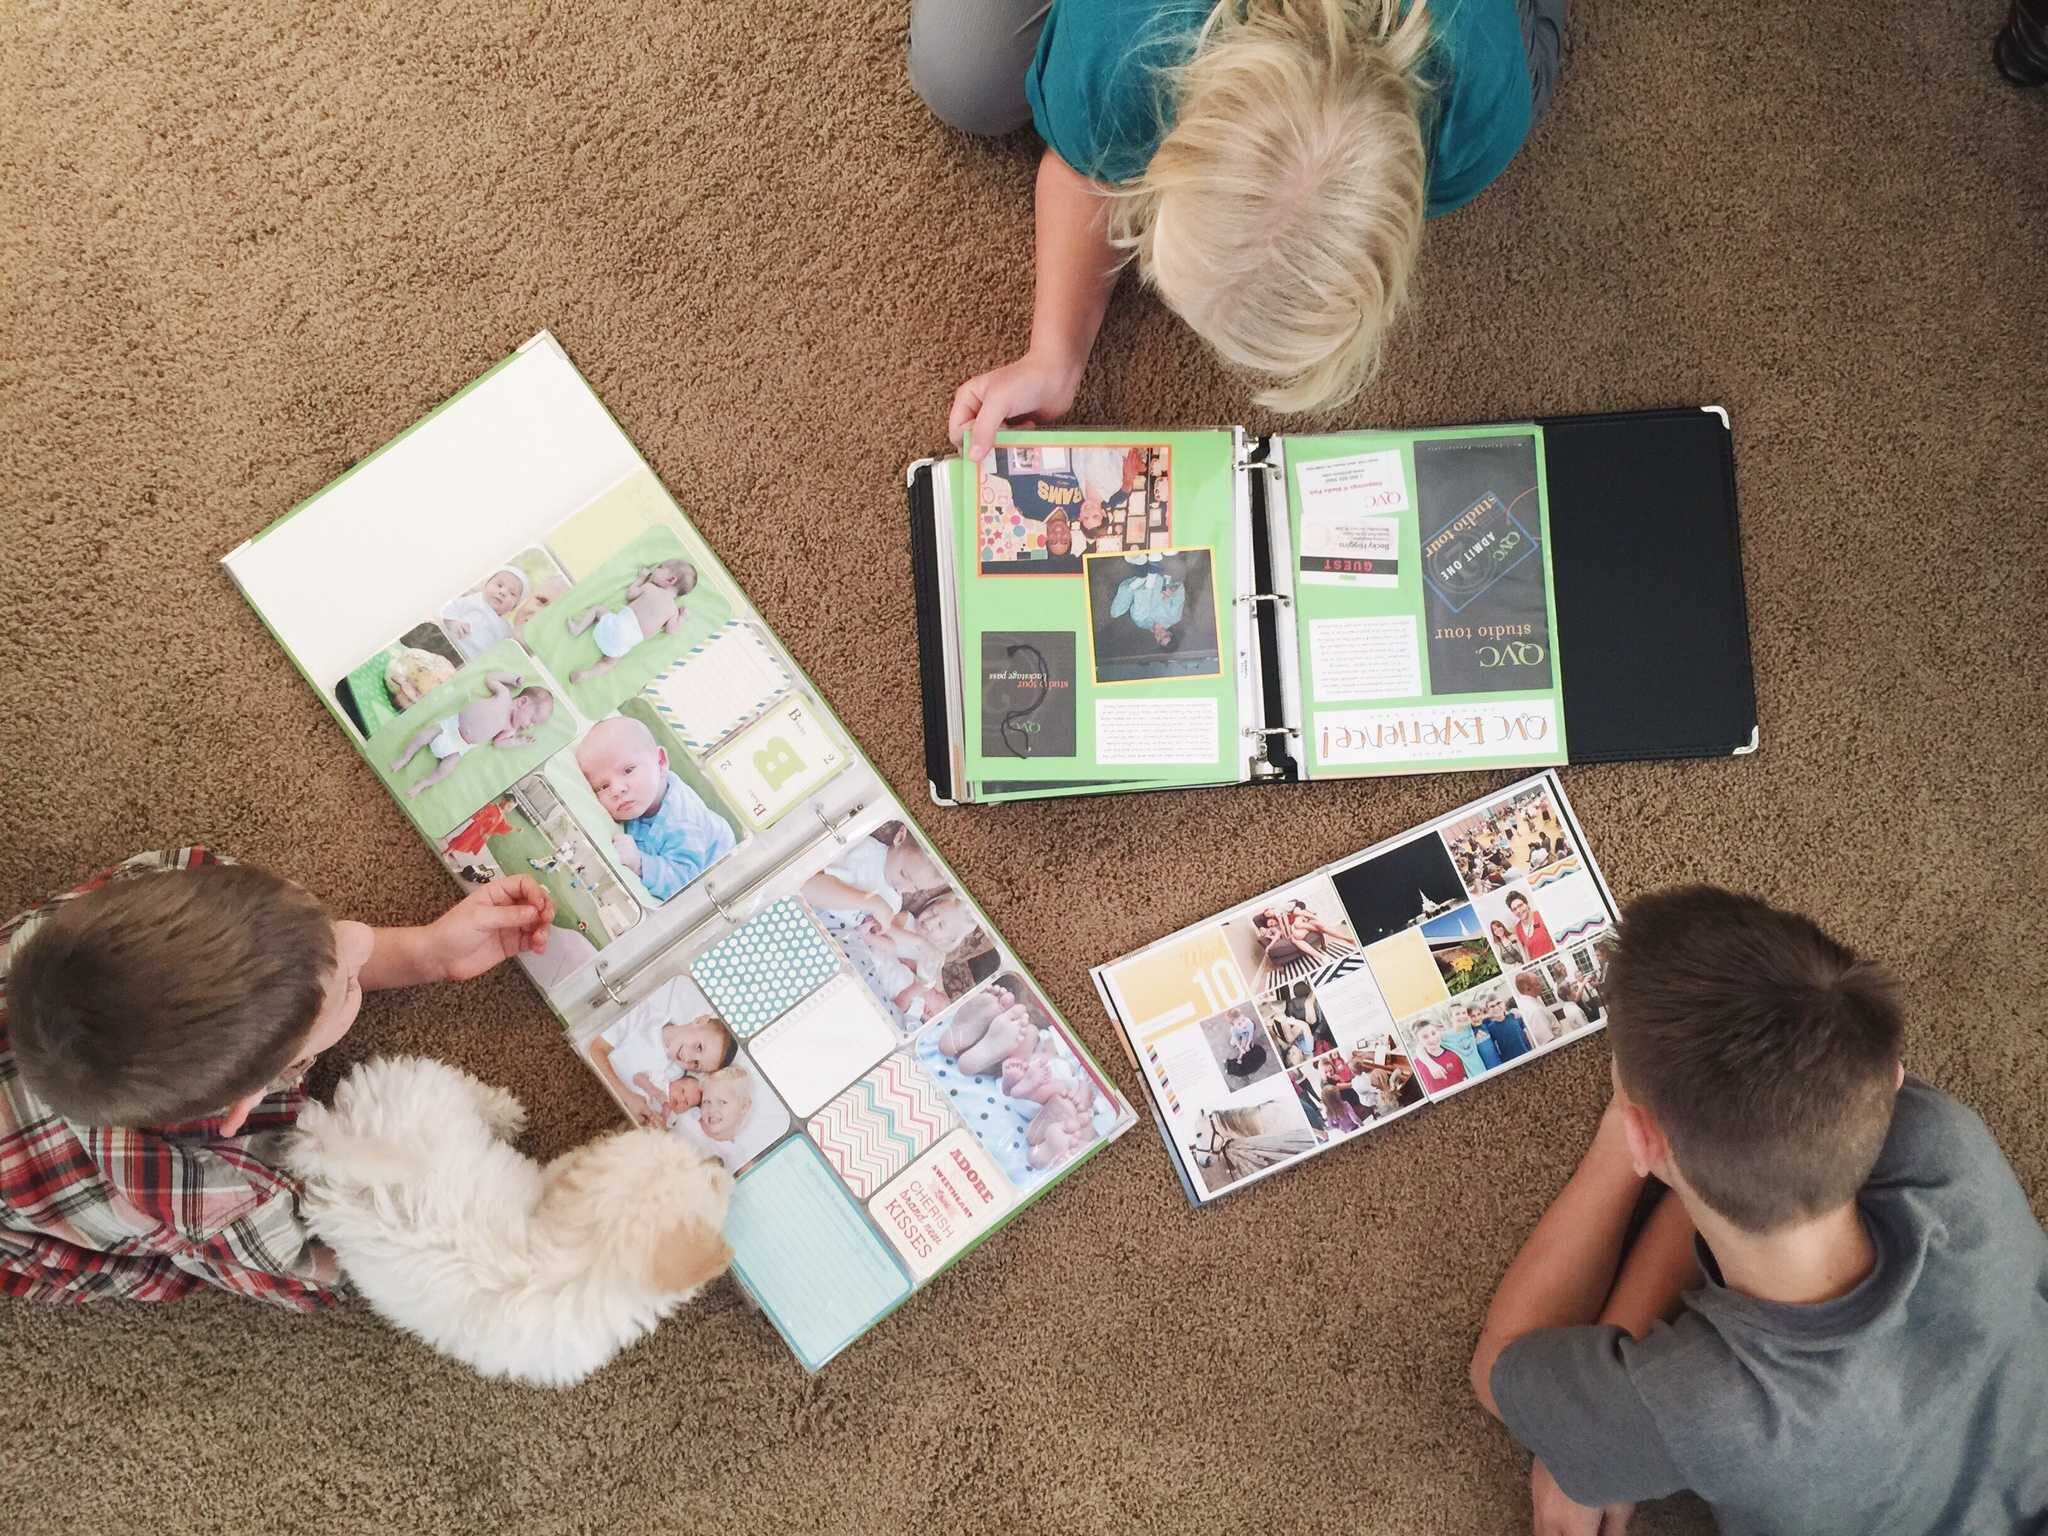
The term “catching up” can have a negative connotation when it comes to scrapbooking. I want to say (and I know many DO say), “Don’t worry about it! Catching up is over-rated!” But the reality is . . . I do care! And so do many of you. We DO want to be “caught up” on some albums, and for a lot of us a big priority is specifically the kids’ albums, right??
Right.
The desire to have scrapbooks for our kids probably comes from a place of wanting our children to have their memories and stories preserved so they’ll have that to reflect on for the rest of their lives. There is scientific research to back up the fact that a child’s self-esteem is highly likely to be increased if they have pictures and stories about his or her life recorded.
So yeah. Count me among those who strongly desire to have “caught-up” albums for my children. I can’t help it. I WANT that. And honestly, I feel very unapologetic about wanting that.
You know what’s ironic about working in the scrapbooking industry? I’ve devoted so much of my life — and for sure my entire career — to helping others to preserve their memories but have sacrificed some of my own personal scrapbooking goals along the way. Now don’t get me wrong. The 150+ completed albums in our home are proof enough that I’m not all talk. I’m an actual, real-life, die-hard scrapbooker. I’ve done a LOT. But ever since starting this company in 2009, I’ve found myself less consistent about “keeping up” with the kids’ albums than I expected.
Nearly 8 years into this whole running-a-business adventure, this is what I’ve learned about my personal experience: Evolution is a beautiful thing. What I once conceptualized for the kids’ albums has shifted a bit and . . . I. am. so. glad! I am honestly thankful that this has been on the back burner for a few years so that I could gain perspective and allow myself to think a little more clearly about what would be the best and most realistic way for me to “keep up” from here on out.

This blog post is not necessarily a how-to guide for everyone. What I’m about to share isn’t an one-size-fits-all solution that will work for every single parent wanting to make albums for their kids. That simply does not make sense or exist because each of our situations is unique. But I will share openly and honestly how I — a full-time working mom to 3 kiddos have been able to find my groove with my kids’ albums and get to a place where catching up is TOTALLY do-able. I recently picked up where I left off with our oldest child’s albums. And guys! I did it! I got completely caught up with Porter’s albums! I'm itching to keep moving on with the other kids' albums but have taken a little break from that project to share all of this with you, then I’ll head right back into it with Claire’s and then Crew’s albums.
Porter is our oldest and currently 14 years old. He’s about to head into the last chapter of his childhood — high school. I can’t even. I mean . . . for real. It kills me to even think about it. And honestly, going through all of this “catching up” has made me even more crazy sentimental. I love so so so so so so so so SO much that he can turn to his albums any time and reflect on his childhood memories, pictures with friends, old handwriting samples, hilarious anecdotes, family trips, ordinary moments at home, his art, awards, and of course so many stories.
Here’s how I’ve done it.
STEP ONE - GATHER
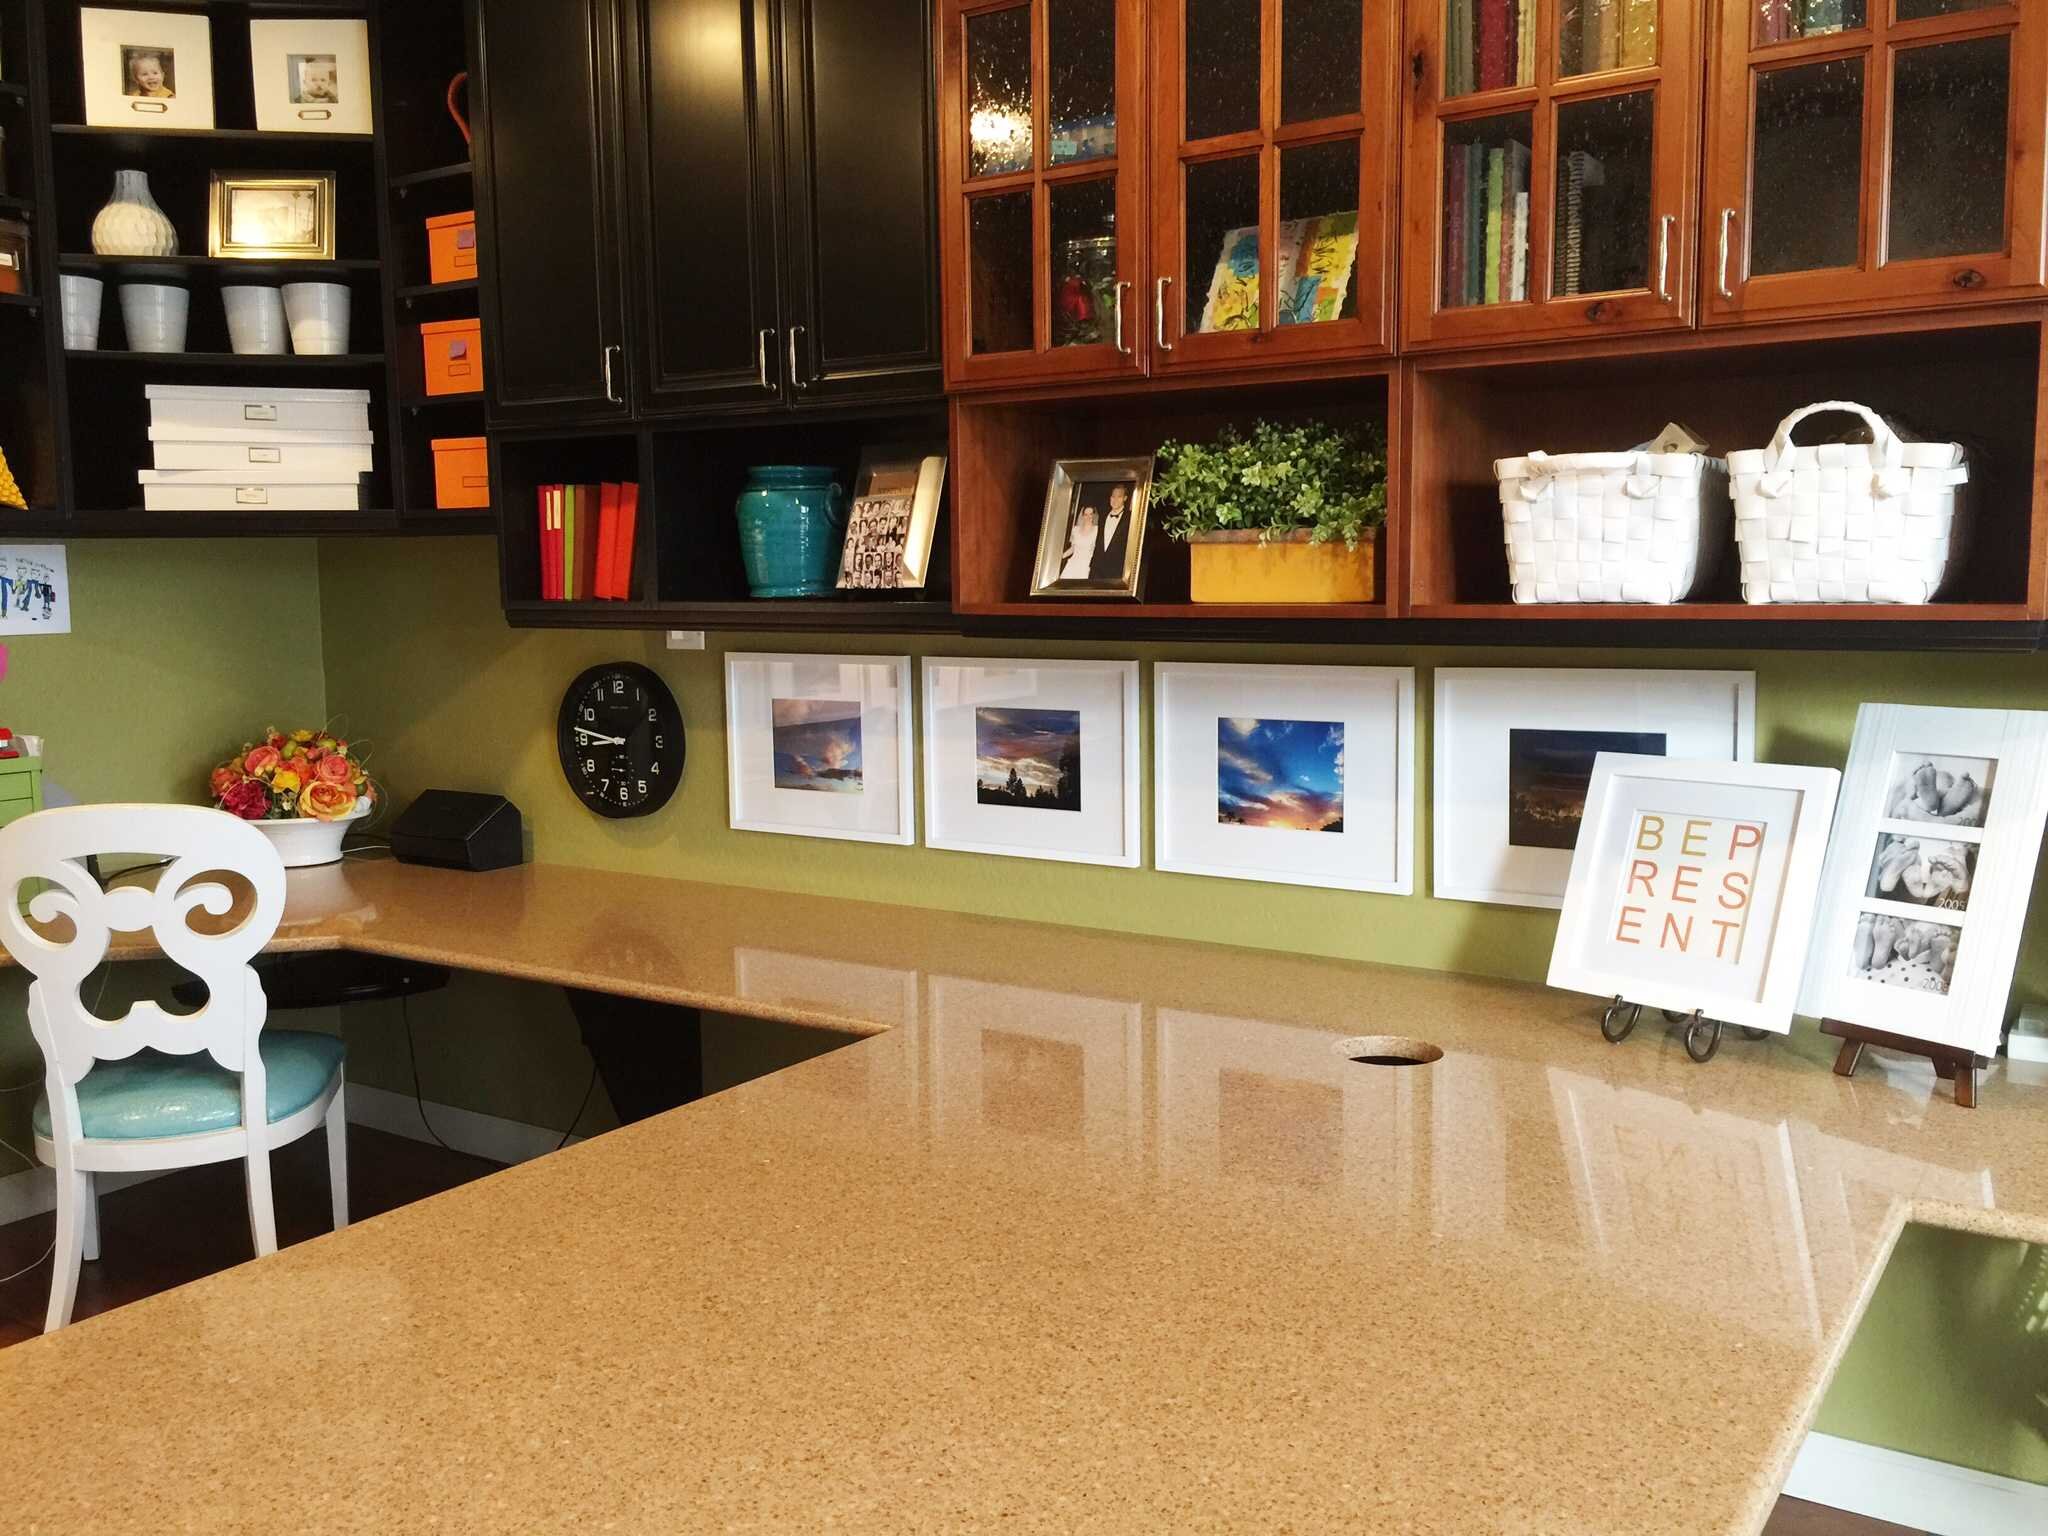
I made sure that all of his “stuff” (pictures, papers, awards, you name it) was gathered in one spot. The last thing I wanted to do is work on all of this and then later come across a drawer full of gems that I didn’t know about or something like that. The gathering spot for all things memory keeping is in our home office. We built this custom “wall of cubes” more than 10 years ago and it has served us very well.
What you're seeing here is a whole lot more than this specific topic of kids' stuff but I figured you might be interested to see the full picture. The top row is all family history stuff. The next row is work memory-related stuff and some other things. The third row down is a cube for each of our 3 kids (grey, turquoise, and black boxes) + some random stuff. Then a row of family albums. And the bottom two rows are where we're storing all of our childhood stuff -- David's and mine.

Back to the topic at hand. Each child has had a cube that was a completely dedicated spot for their memory-keeping stuff. Anytime we came across a potential “to-be-scrapbooked” item, it went into that cube, even if it wasn’t really “organized.” It was THERE and that’s what mattered.

For several years I had small file boxes (one per child) where their stuff was “pretty” organized per year. You can see those in their cubes. In fact, it’s worth mentioning that I did a whole 30-minute instructional video called “Getting Organized with Kids’ Stuff” and it walks you through my system. Even though that video is several years old, it continues to get lots of views on YouTube because there’s a lot of great tips in there. Check it out.

That said, in the recent year or so I found that I was quickly outgrowing the space of one cube per child so I picked up a larger plastic file tote (again, one per child) because I knew it would help me better organize so that I could really get to work. These classic file totes are awesome and practical and the file folder concept (one per year) is very straightforward.

STEP TWO - THE MENTAL GAME
You and I both know that one of the main reasons we don’t scrapbook (or haven’t started or it’s been ages since we’ve done it) is because it’s so overwhelming, right?? Totally. I get it. So you know my secret for kicking overwhelm to the curb? I put on the blinders. I got to a point where I knew I was ready to catch up on the kids’ albums and I knew the only way I was going to be successful is if I put one foot in front of the other. I needed to break it down, be selective, and work on one child at a time. I chose to start with Porter. That means I never allowed myself to become distracted by any of Claire’s or Crew’s stuff. They’ll have their turn very soon. Putting on the blinders has afforded me the FOCUS I knew I needed to knock this out in an efficient manner. And then even working on Porter’s albums, I focused on ONE YEAR at a time. Again, the blinders come in handy.
I also know a couple things about myself that help with my mental game: First of all, sometimes calendaring blocks of time to work on the kids’ albums (or any scrapbooking project) is sometimes how it gets done. My burning desire to catch up on Porter’s albums, paired with an actual calendar item on a Saturday that said “work on Porter’s albums” = I meant business. And I CREATED the time. It didn’t just magically show up out of nowhere, you know?
Another thing I know about myself is that I function best with a cleared and cleaned surface. When it comes to these types of projects, I don’t need any visual or physical clutter in my space. I find that I work more efficiently when the piles are gone (or at least moved out of my view) so I have laser focus on the task at hand. And yes, the countertop gets a total wipe-down before I get to work.
STEP THREE - MAKING THE PLAN
You’ve heard me quote Stephen R. Covey over and over and over again when it comes to memory keeping. That’s because it’s one of the greatest tools that helps me to know what the heck I’m doing. This isn’t going to be magic for everyone, but it certainly helps me! When I envision the end goal or the completed project, I am much better able to have clarity on the steps I need to take to get there.

To be specific about the kids’ albums, I have a vision that the kids will each have 6 albums that will summarize their entire childhood. Side note: For some, that’s way too much and for others that’s not nearly enough. My friend: Please don’t get stuck in silly comparison nonsense. It’s super important that when you learn what others are doing (like what you're learning about me from reading this blog post right now) you then apply concepts to your personalized goals in a way that makes sense for you!
So back to my end goal. My vision is that each child has 6 albums total. And if it ends up totaling over 6 albums that’s totally fine. Not a big deal. Really. One day, when my children have a home and a family of their own (or whenever they want), they take their set of albums with them to keep + enjoy + ultimately pass down to their posterity. These albums are very much focused on them and their stuff.

When it comes to more of the family memories, that mostly happens in our “family yearbooks.” The annual family yearbook project that I do through the Project Life® App is a totally different topic and if you’re interested in learning more, I have a couple blog posts you’ll want to check out — “How I documented 2015 and why I’m doing it again in 2016” and “Becky’s memory-keeping resolutions.”
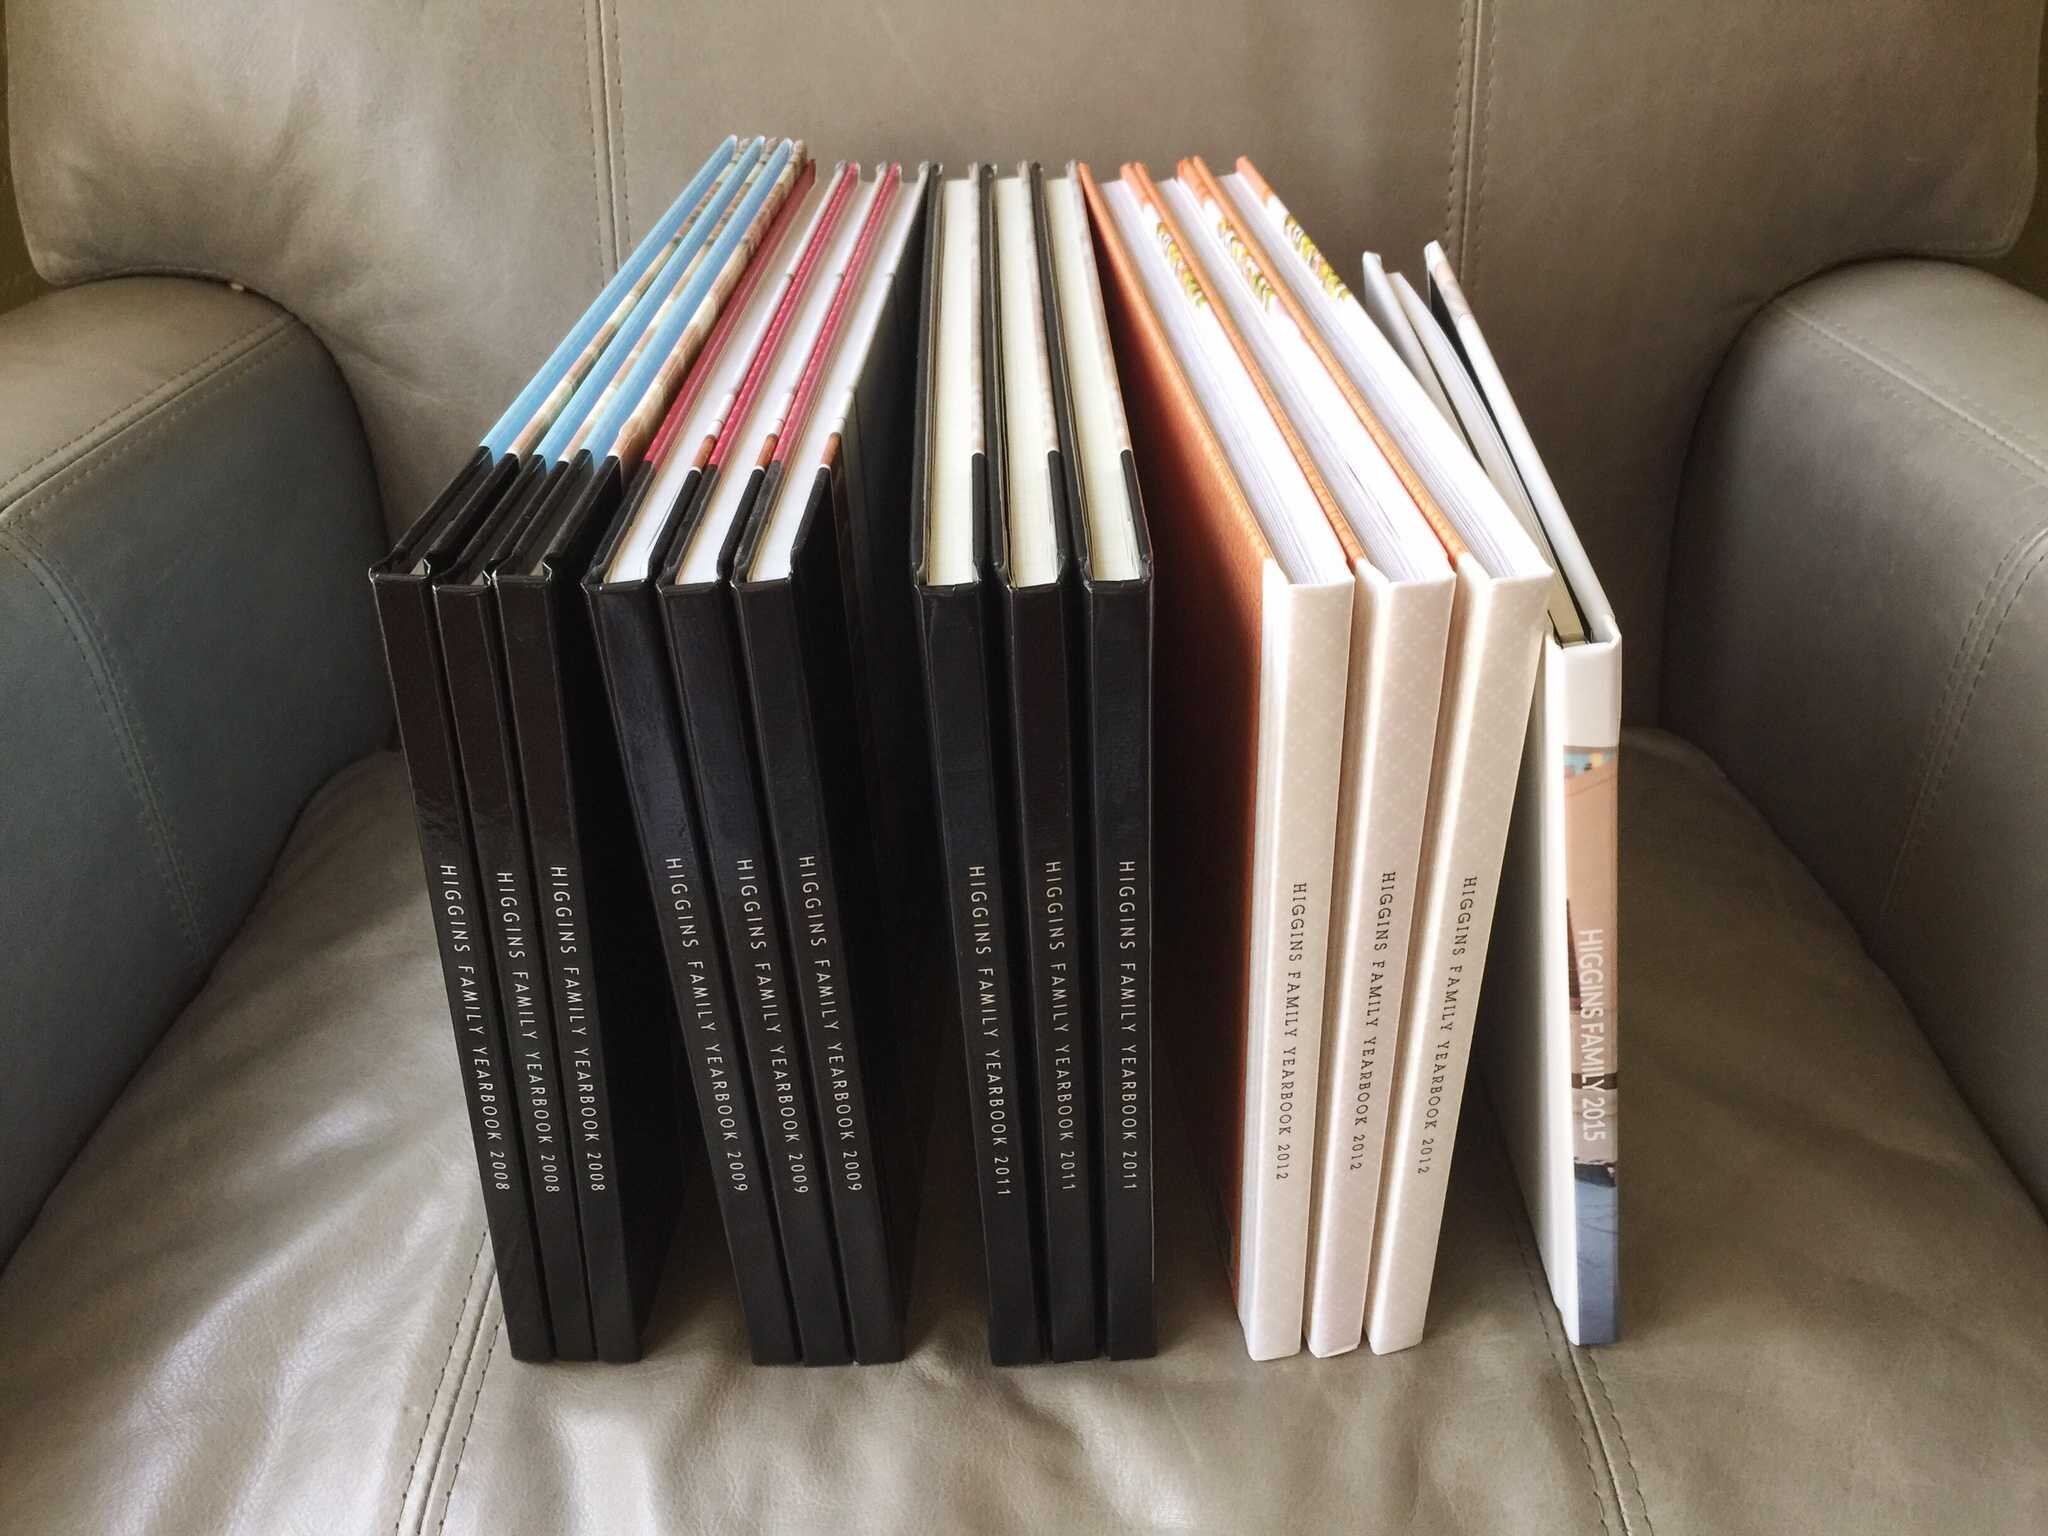
This photo shows that we’ve printed 3 extra copies of each family yearbook so each child has a copy of each one and ultimately they’ll have that full set of family yearbooks to keep forever. I used to print our family yearbooks through Shutterfly. Now I print all of our photo books through the Project Life App. It’s hands-down the best quality and the books are incredibly gorgeous. Learn more about the photo books here.
Getting back to my point about making a plan . . . Knowing that I have this goal of 6 albums for Porter, and because he already had a few full albums from my “traditional / creative” scrapbooking days, I then figured out some simple math so that I knew how many years of his life I needed to fit into the remaining albums. I loved doing this because it helped me to know how to CONDENSE. Without condensing and putting parameters in place, I’m afraid he’d be heading off into the world with a U-Haul trailer full of scrapbooks. And let’s be honest — no one wants that.
STEP FOUR - GET TO WORK!
Yep. It was time to get down to it and make things happen! And it went down like this:
I put all random stuff in its proper year. Sticky notes to label each year helped me to create those piles. My countertop was covered.

Eventually it all got moved to the tote. Each year had a hanging file in the tote. Very straightforward organization.
When it was time to move on, I removed one file folder from the tote (one year’s worth of stuff) at a time. Remember the blinders.
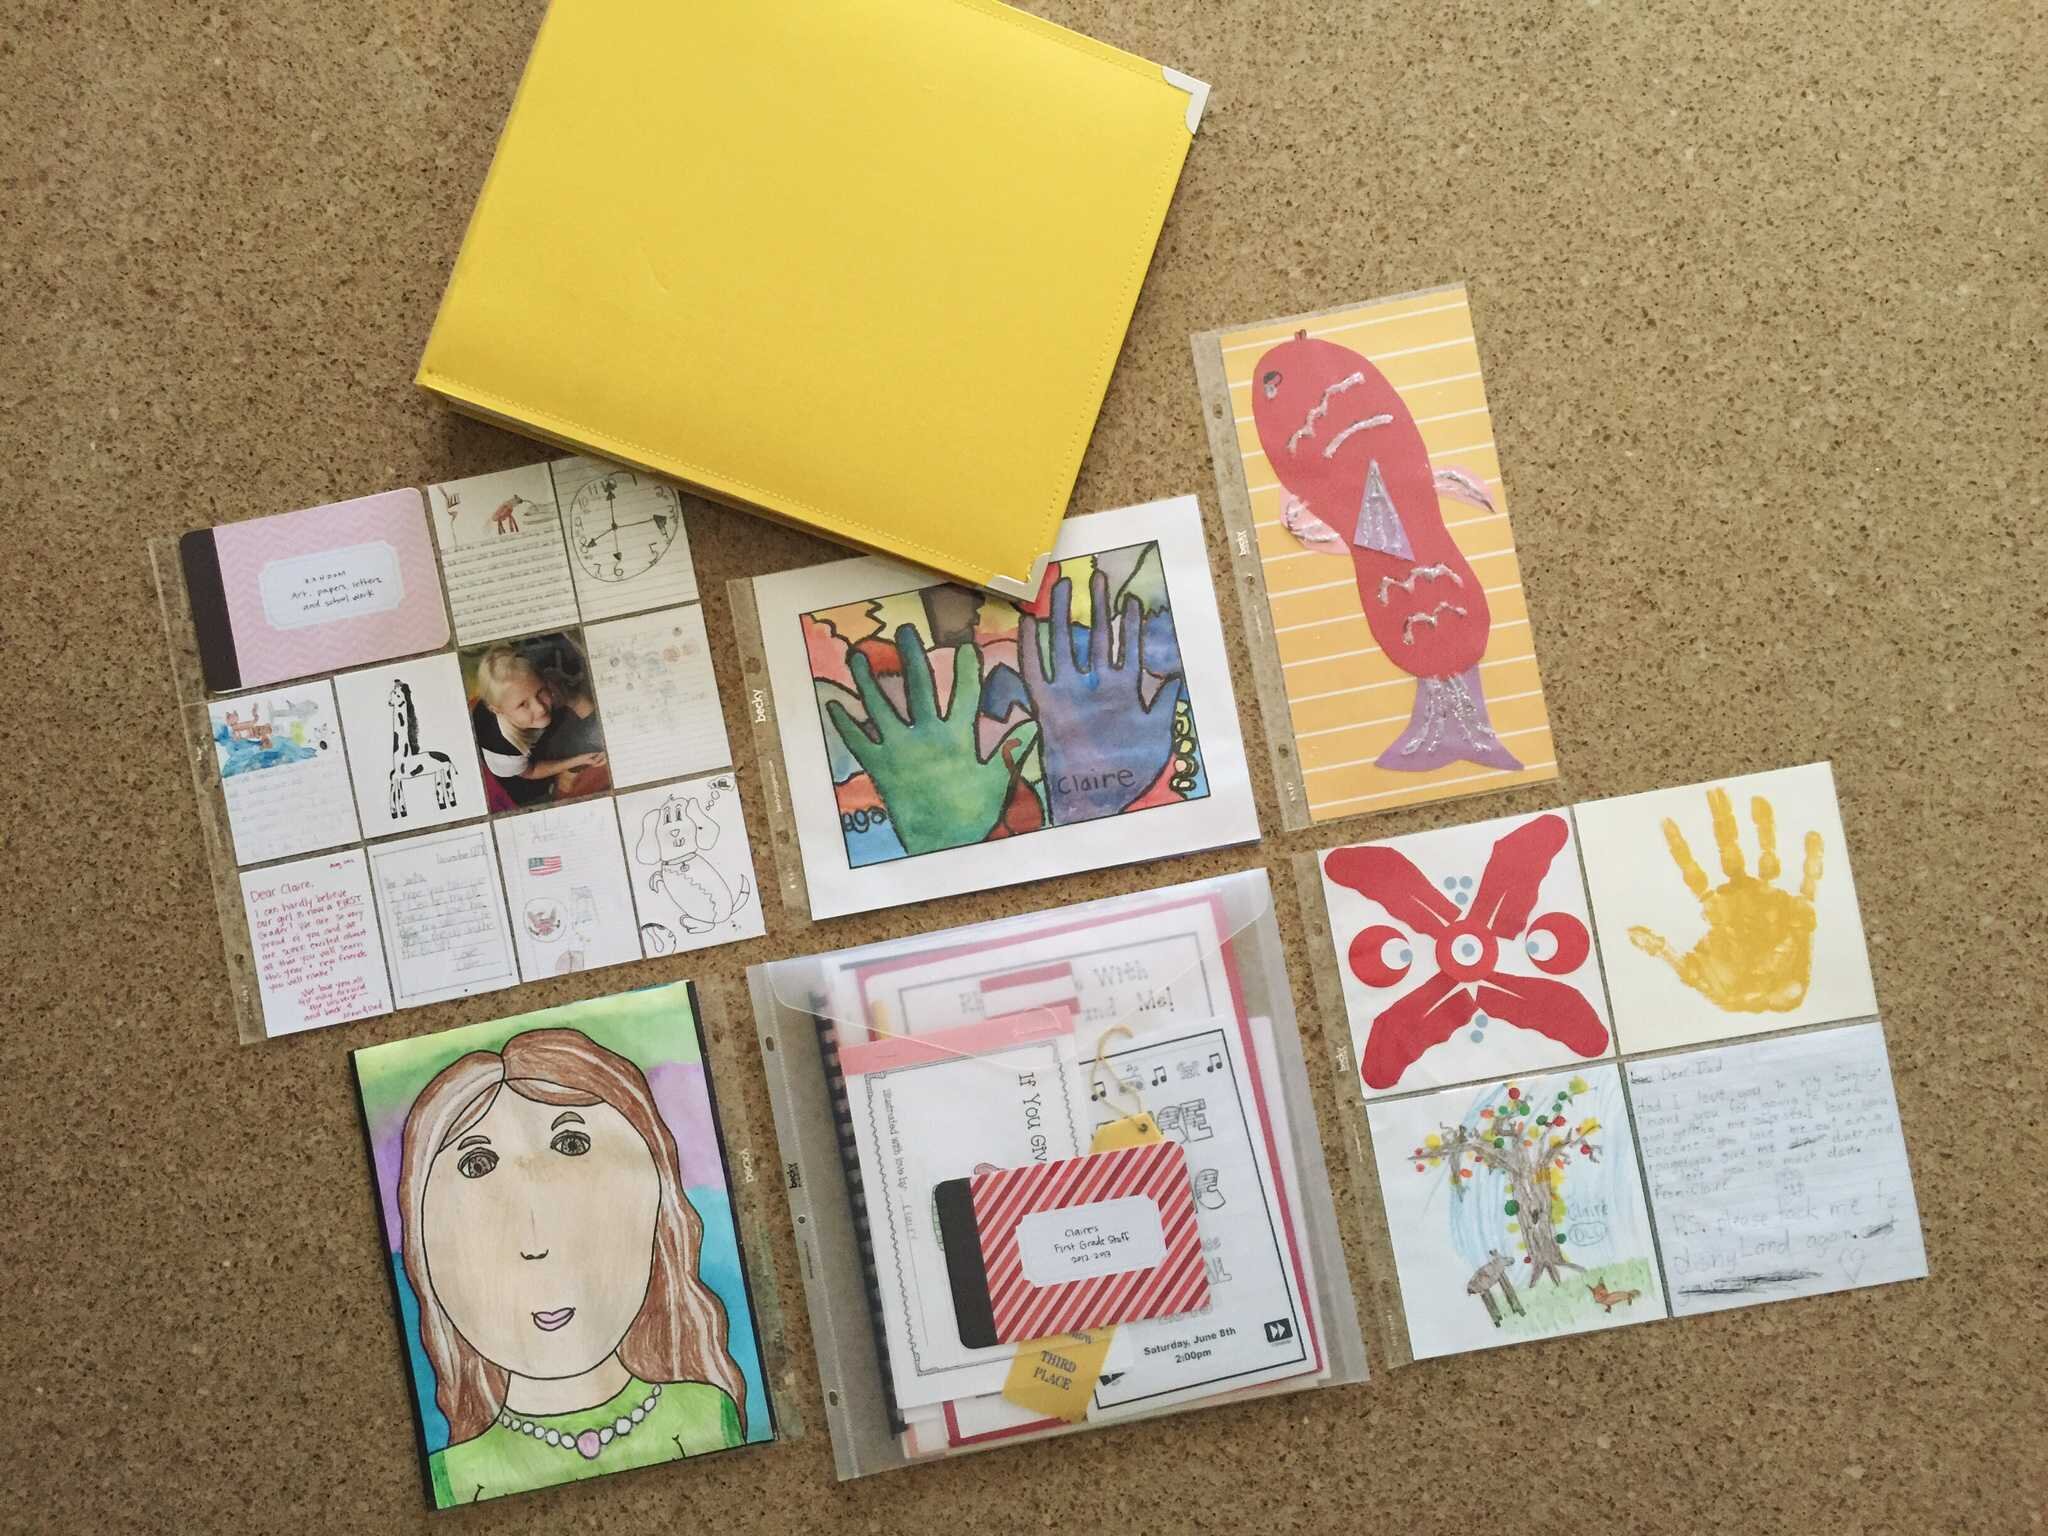
I went through and made 4 piles per year: 1) Originals to keep in the scrapbook (either in Envelope Pages or Page Protectors or Photo Pocket Pages). 2) Stuff to scan. 3) Stuff to photograph (because it’s too dimensional or large for regular scanning). 4) Stuff to throw away.

Once the sub-category piles were ready I actually took care of each of those 4 piles: 1) Put the originals into the pages however they fit best. 2) Scan stuff. I super love this scanner. And this videoshows how I use it.3) Photograph stuff (something I describe in more detail below). Keep all those scanned and photographed files organized per school year in Dropbox and then make app pages with it all. 4) Actually TOSS stuff that you don’t need. In this videoI do share some thoughts about how to choose around the 14:50 mark. In fact — once you have scanned and photographed stuff, you can toss those originals too! It actually feels really, really liberating.
Once one year is completed, move onto the next. And then the next. And so forth.
BUT WHAT DOES THIS LOOK LIKE?
I can write about this all day long and show you pictures, but nothing will illustrate what the heck I’m talking about better than watching some video of my real-life process and work flow. I’m talking about the actual catching-up-on-Porter’s-albums process! I happened to record it all in my Instagram Stories recently and I saved those videos for your benefit. You can catch the 3-part series on YouTube!
Watch Part 1
Watch Part 2
Watch Part 3
APP PAGES
Above I mentioned that I put together “app pages” with the scanned and photographed artwork and certificates and papers and such. This is where my two favorite scrapbooking worlds collide in the most beautiful way! I absolutely positively love the physical product because it makes so much sense to have a place to put their actual “stuff.” And yet, the idea of scrapbooking in the palm of my hand, no matter where I am (on a plane, sitting in the car pool line, laying in bed) . . . well, it’s more than a brilliant idea. It’s a REALITY with the Project Life App.
This, my friends, is called HYBRID SCRAPBOOKING and it’s a beautiful thing. Once I make those app pages, I order prints directly through the app (choosing either 8x8 or 12x12 size) and then slip those prints into Page Protectors (as shown here in this picture) and add those to the albums along with everything else. Yes! Again, those 3 videos above will walk you through what I can’t adequately describe with typed words.
Just watch the videos. Like, for real.

GETTING SPECIFIC ABOUT CHILDHOOD “YEARS”
I don’t follow a calendar year. This is how I’ve organized my children’s scrapbooks. And it’s worth noting that I used these Scrapbook Dividers to actually create sections, which makes it easier for us to put our finger on pretty much anything we’re looking for -- quickly. Porter's first album is FILLED with history (like his family history, our home, our journey to have him join our family, etc.). Then his birth and first weeks of life. His second album is really his first year of life with monthly highlights and milestones and family stuff. Then it goes into toddlerhood and pre-school and elementary school. You can see that the older he gets, the more years I am fitting into one album. I'm not following any rules or guidelines. I'm just going with the evolution of my method along the way.

History
Birth
First Weeks
Year One
Year Two
Year Three
Year Four
Pre-School
Pre-School (2nd year)
Kindergarten
1st Grade
2nd Grade
3rd Grade
4th Grade
5th Grade
6th Grade
7th Grade
8th Grade
9th Grade
10th Grade
11th Grade
12th Grade
Once we go into the school years, each “grade” / year of life basically starts in August (with a new school year) and goes through July of the following year. So the summer after the school year is part of that same section or "year".
WHAT GOES IN THE KIDS’ ALBUMS?
For my kids’ albums, they’re basically full of their “stuff!" And it’s not just school stuff. These are CHILDHOOD albums. Not just school albums. What I'm talking about are all the awards, certificates, ribbons, medals, birthday cards, assembly and performance programs, and on and on and on. You know . . . STUFF! Much of this goes in an Envelope Page, and I have one of those at the end of each year, but you could also just have one at the back of each album. Whatever makes the most sense for you!
But wait — what about all their pictures??
Remember those family yearbooks I mentioned? Those photo books are up to date and PACKED full of the best photos of everyone in our family, all year long. What this means is that I feel completely content that the kids’ best pictures are already preserved! They’ll have them in the context of the family yearbooks.
See where I’m going with this??
I have given myself permission to RELAX. I’m not stressed about figuring out pictures to print to mix into their 12x12 albums any more. Their albums have become more about their “stuff” and less about their pictures. Yes, there are a few school and sports pictures in the albums, but most of the pictures we care the most about are in the family yearbooks. Are you still with me? Can you visualize it? This walkthrough video of one of Porter’s albums will help make sense of this.
This decision has single-handedly caused me to feel less burdened and more relieved. I honestly think the idea of printing photos was THE main roadblock that kept me from catching up on the kids’ albums for the past several years. But guys -- no longer. What's really cool is that I can always add in a page or two or more if I feel like I do want to add more pictures down the road. Album flexibility for the win!
OTHER TIPS
E N V E L O P E P A G E S A R E T H E B O M B . C O M .
They’re designed to hold stuff in your scrapbooks, making those completely protected, organized, and accessible without necessarily putting those things on “display” in the pages. You can find a variety of sizes here.
G E T T H E K I D S I N V O L V E D .
And I don’t mean force them into this. I mean invite them to participate and if they do, great! If they don’t, well, that’s fine too. I promise. And trust me, it’s not because they won’t one day appreciate your efforts and absolutely treasure these albums. Before I really dived into Porter’s albums, the past couple of months I asked him: “How involved do you want to be? Or do you trust me completely to just run with it?” His answer came without hesitation: He wanted me to just do it. Of course I asked him questions from time to time. “Do you remember which grade this art was from?” or “Would you rather keep this paper or this one?”
And guys, I totally found him flipping through his albums from time to time during all of the catching up and my heart wanted to burst. I’m already enjoying the fruits of my labors and it’s the neatest feeling!
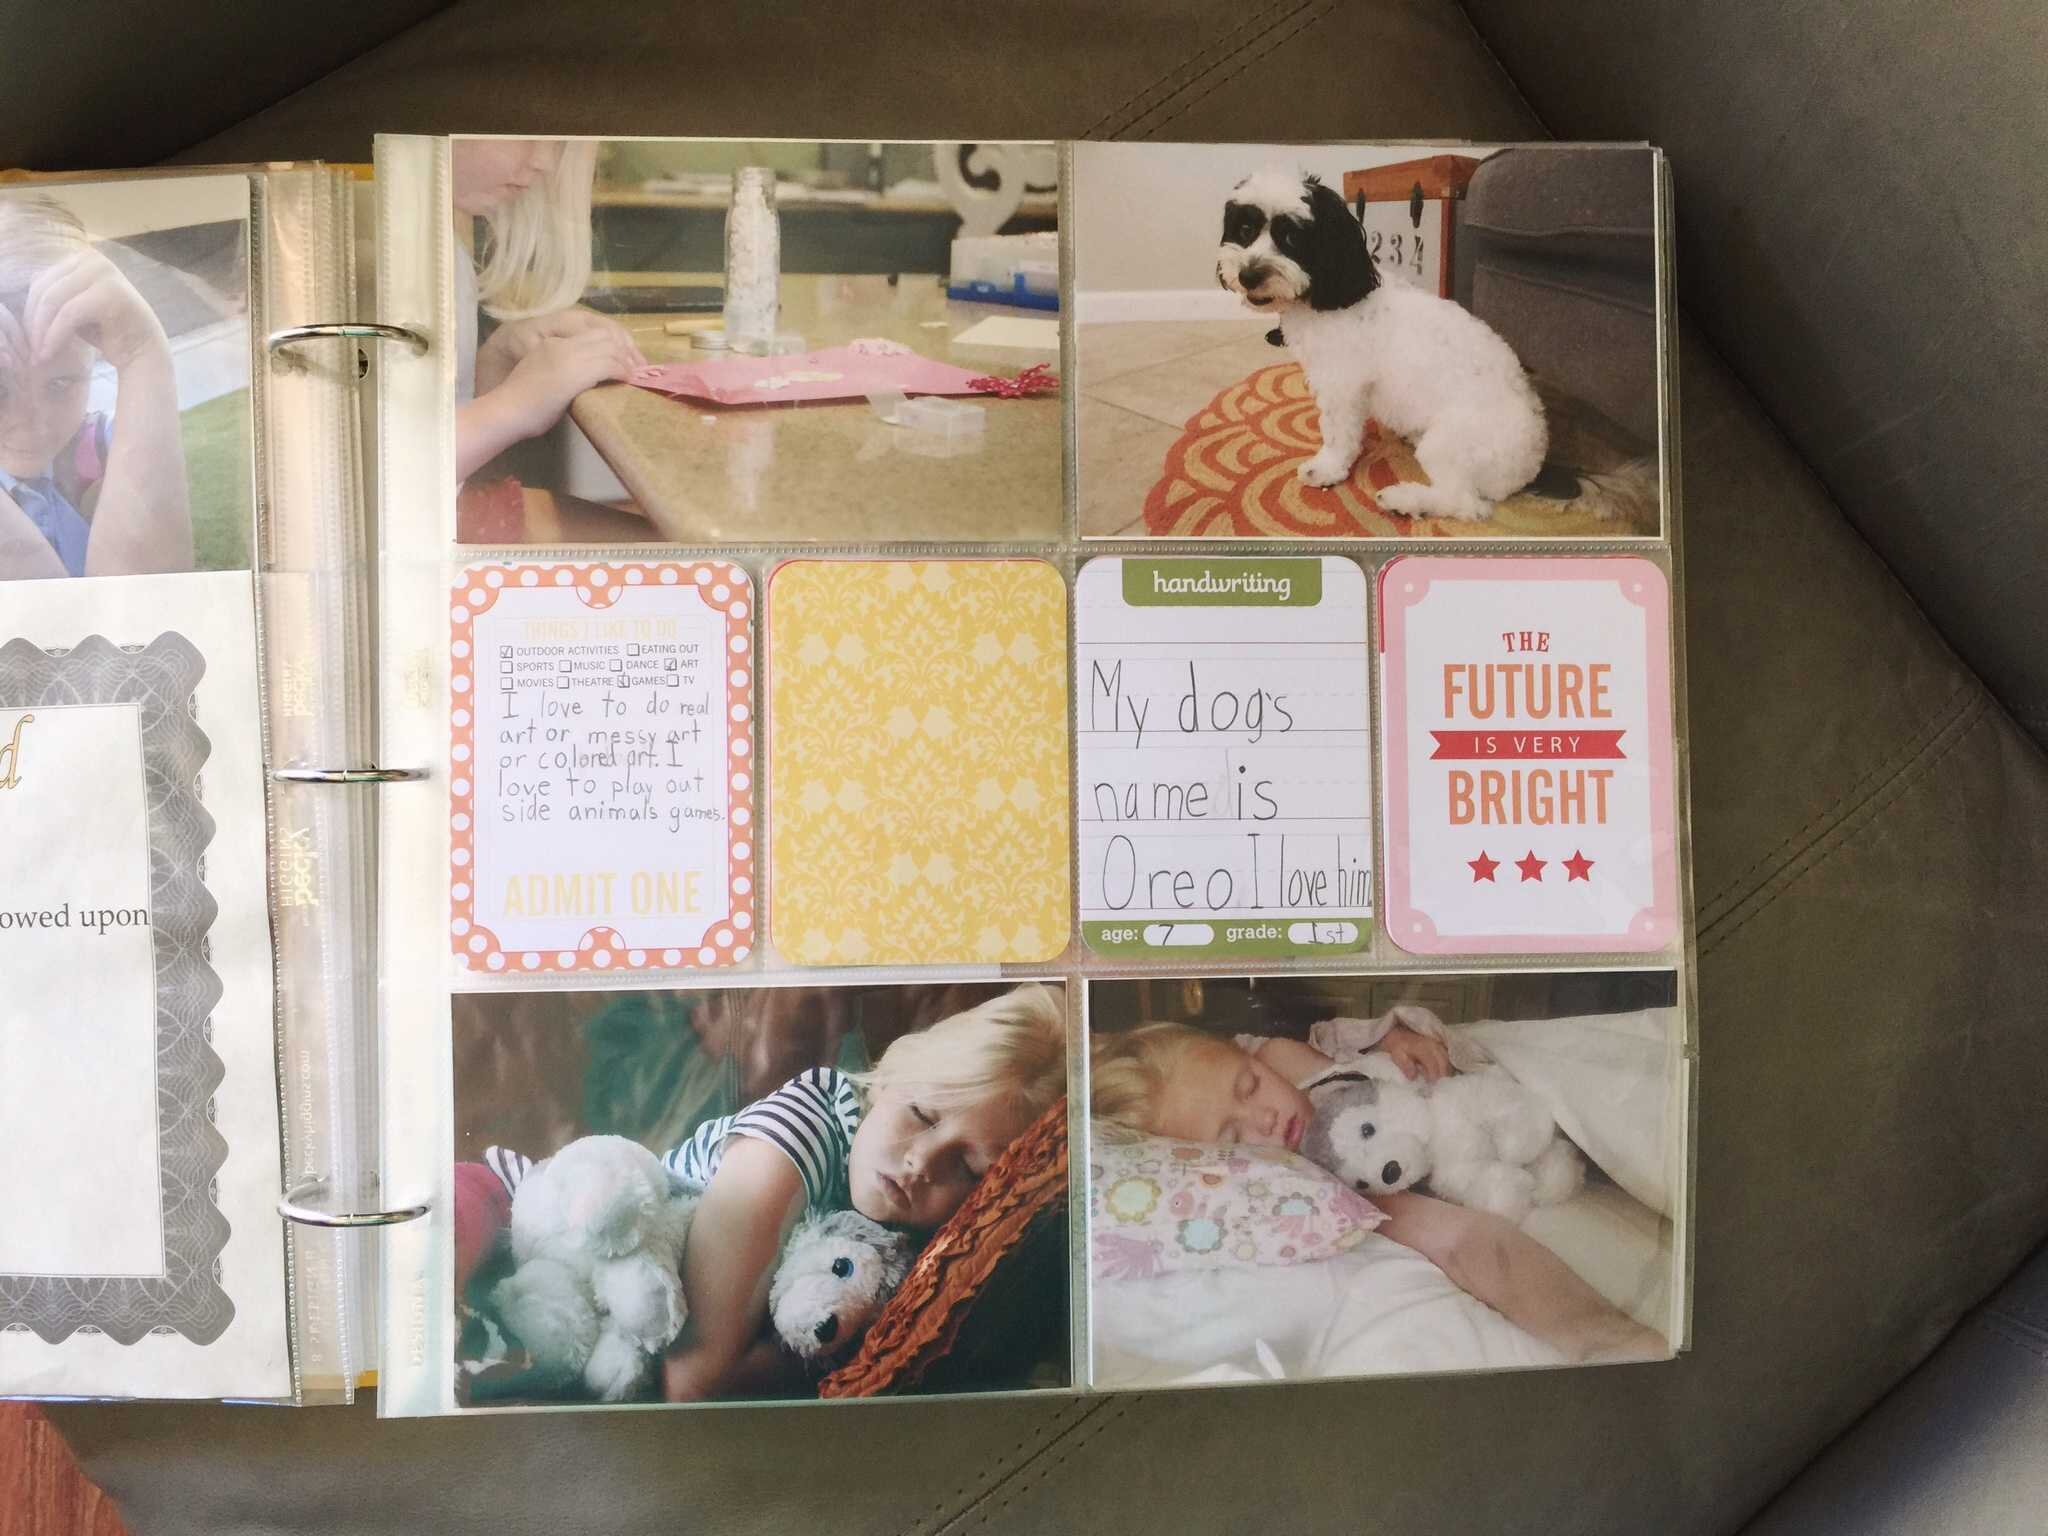
Another way to get the kids involved in their scrapbooks (whether you’re working with current stuff or going back and catching up) is to have them write some of the journaling. Our Project Life cards are small and very un-intimidating. Capturing their handwriting and stories or notes in their own words --it’s priceless. Also, don’t think about this as all or nothing. Just because you can’t seem to have your kids write on every card or “participate” in every year doesn’t mean you should throw up your hands about the idea altogether! Just get what you can. And relax about it. This is a Project Life page in Claire's scrapbook from a while ago.
C H I L L O U T .
Okay, let’s talk about that for just a moment, shall we? I know it’s tempting for a lot of us to get caught up in a million details and sometimes that is just the thing that keeps us from doing anything at all, right?? Stop that, silly. You and your OCD tendencies need to have a heart-to-heart and this is what I want you to remember: The end result of your efforts is a completed scrapbook, right? So does anything else matter more than that? Does it really matter which cards you choose to slip into those pockets? No. Does it really matter if things aren’t in perfect chronological order? Heck no. Does it matter if you can’t find that one picture from that one time? I know it’s killing you, but should it keep you from doing the rest of that year? Um, okay. You do know the answer to that, right?

Right. Relax. Take a deep breath. Please don’t let perfectionism keep you from doing something. You are so much more capable of knocking this out than you realize. I wish I could lovingly grab your shoulders right now, look you square in the eye, and tell you how I feel. You making the choice to preserve your child’s memories and pictures is a beautiful thing. Don’t overthink this. Don’t force yourself into a method that doesn’t suit your needs well. Do what works for you!

T H R O W S T U F F A W A Y .
I don’t mean to make you all tense right after I am trying to loosen your shoulders, but I do want to address this idea of throwing things away. If you’re absolutely, positively certain that you can NOT throw things away, well then, who am I to stand in your way? If it makes you uncomfortable that you lose sleep over it, then don’t toss stuff. If you’re open to the idea let me explain where I’m coming from.
Stuff is stuff. Of course some stuff is more special than other stuff and that’s why we buy / collect / keep stuff, right? Right. And it’s really lovely to enjoy stuff, especially the sentimental things like photographs, Grandma’s quilt, our favorite necklace, and other treasures.But how much stuff is too much, you know? Sometimes it’s the stuff that can completely weigh us down (and we may not even realize it!).
So you know what feels really, really great? Decluttering. Paring down. Scaling back. When it comes to memory keeping, the goal isn’t to have every single picture that ever exists of our our child in a scrapbook. I mean, it’s just so much! The goal is to have a sampling. So in the context of our kids’ scrapbooks, if you’re facing huge piles / bins / drawers full of stuff, I invite you to consider that a sampling of that would be plenty sufficient.

E N D O F S C H O O L Y E A R S T R A T E G Y .
While I haven’t kept up with this perfectly over the years, I have done it a couple times and I highly recommend it. The idea is that you collect your child’s things (papers, art, etc.) in a folder or box or “spot” of some kind throughout the school year. And you don’t necessarily scrapbook in their albums during the school year. Did I just suggest to NOT scrapbook?? Hold on. Stay with me.
At the END of the school year, you and your child completely unload their backpack of any remaining items. Anything else there is to add to the folder / box / spot is added.
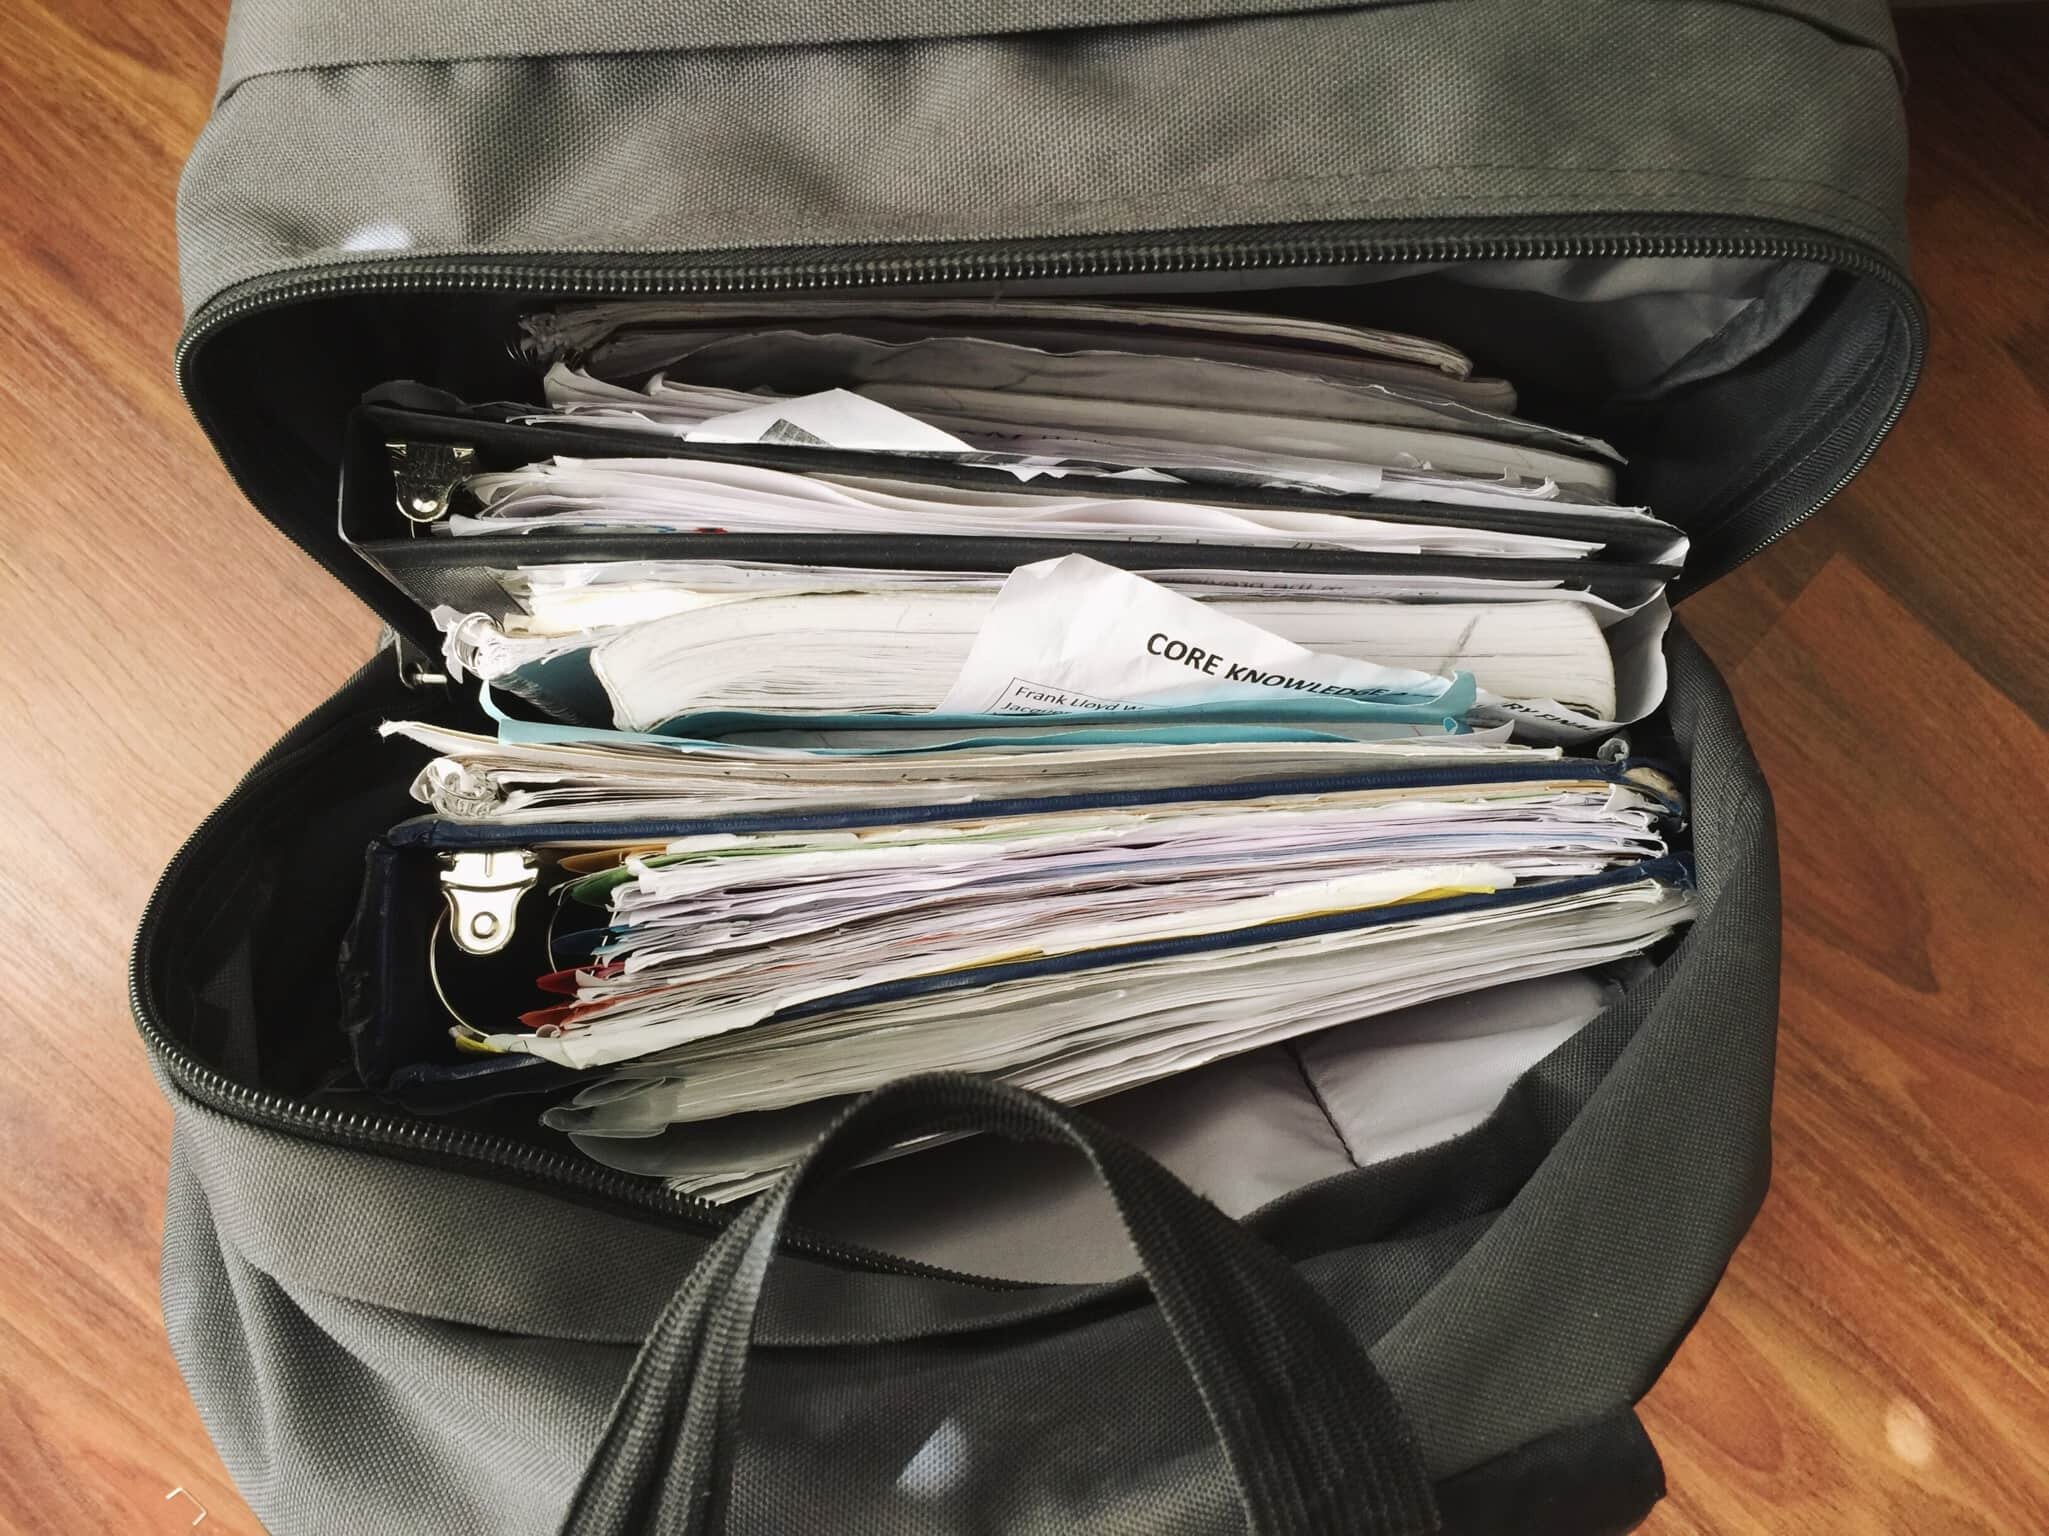

NOW — at the end of the school year — you can have that perspective that you can’t have throughout the year. NOW you can look at a school year’s worth and have a clearer vision of what really is important to keep and what really can be let go. Case in point: If your kindergartener brought home 60 pieces of artwork throughout the year, you would SEE that mass amount at the end of the year and then be able to sift through that pile, cut it down to half of that (or whatever) and look what you just did. You CONDENSED. Because you were in the right frame of mind to do that. Because hindsight is 20/20.
It’s just a thought. There are no rules here.
S C A N N I N G + P H O T O G R A P H I N G S T U F F .
I’m a huge fan of this, guys. Huge. I have found that the perfect happy medium between throwing stuff away and hoarding it all is this: Keep a FEW originals (favorites) and everything else that you want to keep but you don’t want it to take up so much space . . . you scan it. And if it’s too big or bulky to scan, you photograph it. And all of these treasures that are scanned and photographed get popped into Project Life App pages, which are then included in the albums! I walk through all of this in those video links above. For real, watch the videos.
Okay — Do you see it? Do you catch the vision?? Because I really want you to feel the beauty of this concept. The artwork and the papers are still preserved. They’re still in the scrapbooks. But it all takes up waaaaaay less space. And that feeling of tossing so much stuff? Ahhhhhhh. Liberating. I’m telling you. I’ve done it and I’ll keep doing it and I love it!

Obviously you need to know what it feels like to scrapbook in the palm of your hands, so if you haven’t downloaded the Project Life App, I’m just wondering what you’re waiting for. It’ll be the best $2.99 investment of your memory-keeping life. Trust me on this one. Tap around and you’ll see just how easy it is and why our app customers call it a game changer.
Okay, gotta get down off my soap box. But man, this stuff is exciting to me!
So . . . photographing stuff. I’ll just touch on that for a minute. Here are my recommendations:
1 - Set up a spot where you have room to drop things on the floor.
2 - If you have a nice, neutral floor (carpet or hard surface -- doesn’t matter) that’s great. But consider picking up a board for the purpose of taking pictures of your kids’ stuff. Easy to find at a craft store or even Target or Walmart. I am liking black the best because white is tricky to make it look truly WHITE and even wood grains can be inconsistent from picture to picture. My best advice? Experiment. You will find what works best for you.
3 - Place your item on the floor or the board and stand directly above it, not at an angle. Shoot straight down. In this picture to the right, I actually stood on that chair.
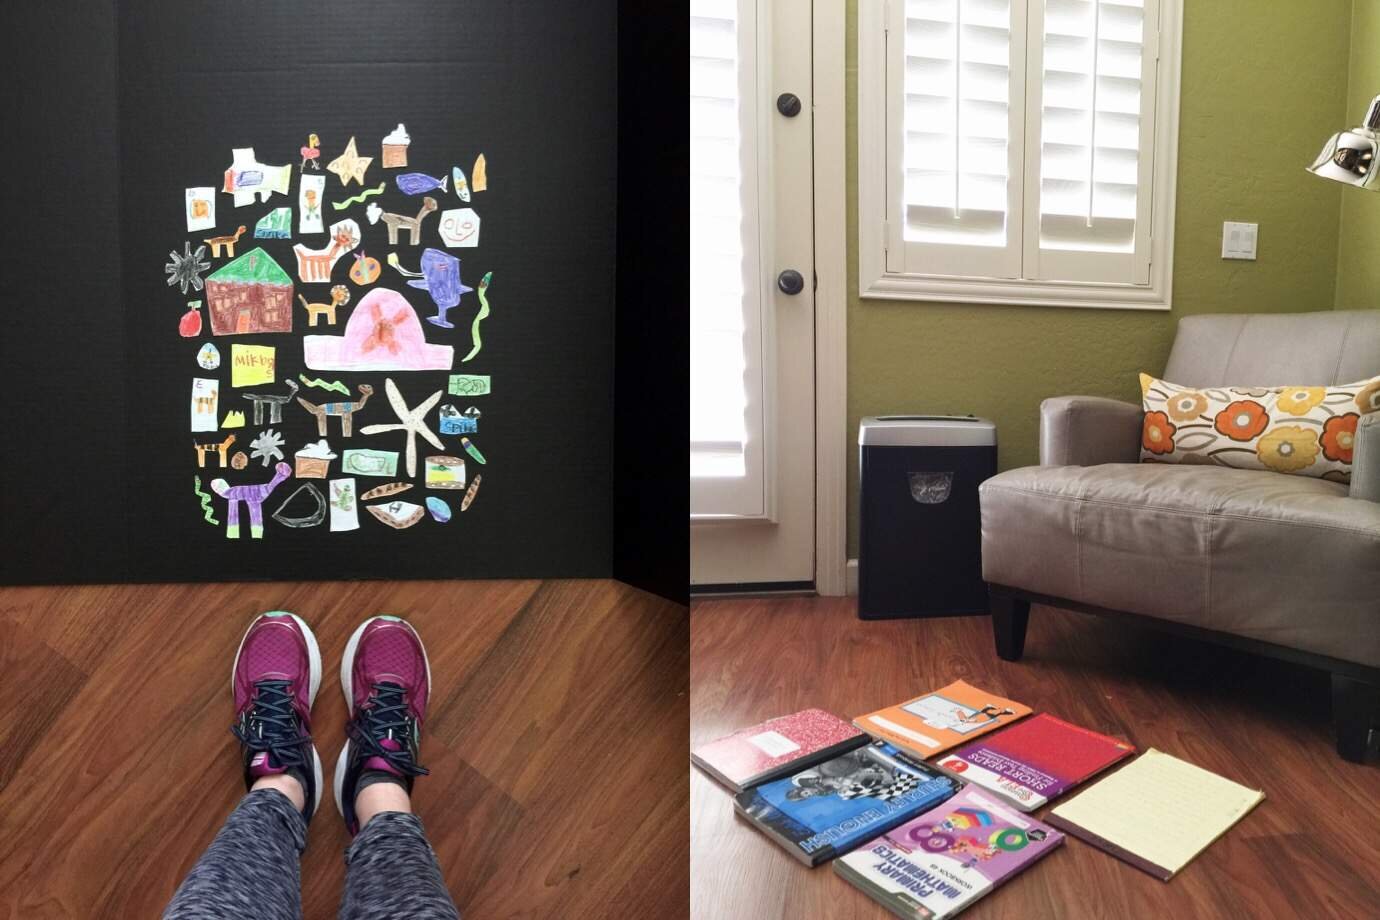
4 - Choose a spot DURING THE DAY where you get natural, indirect light. This will illuminate your item without creating harsh light or shadow situations. The lighting should be flattering.
5 - Hold steady when you take that picture. You want clear pictures, not blur.
B A C K G R O U N D N O I S E
It's worth mentioning noise for just a moment. You know what I listened to while working on Porter's albums? "Alexa, play the La La Land soundtrack." Oh yes I absolutely did. And on repeat. Over and over and over, I listened to my latest favorite album. Was it random? Nope. Before I got started I thought about what music would motivate me and keep my energy up and help me to feel all the feels. And that was the first thing that popped into my mind. So I went with it . . . and it worked! The music helped!
The tip here isn't about the La La Land soundtrack. The tip is this: Think about what background noise WORKS for you. Is it movies or your favorite Netflix series? Is it music? What KIND of music? Is it silence? What's going to motivate you to keep trucking along? Whatever it is . . . do that.
How are you doing? I know this is a lot. The last thing I want you to feel is overwhelmed. Okay, who am I kidding? This idea of catching up on kids’ albums IS overwhelming! But here’s the thing, my friend: It is 100% do-able. And the reason I made this so long and so packed full of details on what I do is because I want you to feel even just one or two takeaways that resonate with you, that will HELP you to tackle this once and for all! There is no service, no product, no magical app that can just make all of this magically happen. You are the key. I’ve given you lots of tools that will help.
An organizational system.
Products to pull it all together. ***
The Project Life App.
Links to products that help.
Practical tips that work.
And, of course, my real-life experience of doing this. Did I mention that catching up in Porter’s albums (which was about 5 years’ worth of stuff) took me just 2 or 3 dedicated days? I had a plan. A vision. A goal. It’s all been outlined here for you. Because I KNOW you can do this. I KNOW that those feelings of being just completely burdened by the bins full of stuff and the guilty feeling when your child asks for a picture or something and you have no idea where it is. Those feelings don’t HAVE to weigh you down any more.
*** It's totally worth mentioning to those of you who are just learning about Project Life that all you need to create an entire 12x12 physical scrapbook are these 3 things: 1) 12x12 album, 2) a Big Pack of Photo Pocket Pages, and 3) a Project Life Core Kit. Of course your photos + a pen for journaling as well, but just those key ingredients will do the trick! Aaaaaand . . . if you visit our shop HERE, you'll see the green "Build your bundle now" button. Click there to select your 3 items and we'll automatically add a 20% bundle discount, which you will see at check-out!

This empty bin is one of my favorite photos ever. It represents completion. It represents love. It represents peace of mind.
As you take a deep breath and process all of this, you may still have questions. While I'm not able to offer one-on-one help for everyone, the next best thing is that we get together in a virtual and live format and discuss this. Care to join me? I'll be getting on Facebook Live soon to answer YOUR questions on this topic of catching up on kids' albums. That exact date + time will be announced on social media (be sure you're following us on Facebook or Instagram). Meanwhile, we will pull from the questions left right here, so let me know what's on your mind, where you're seeking further clarification, or what you're still wondering about.
Also -- Feel free to right-click and save any of the graphics from this blog post to use as reminders that you can put in your work space. We made them pretty just for you. ; )